• Please read this manual carefully.
  • To ensure a long life of the device, usage should be correctly supervised.
  • The unit contains liquid soap, it shouldn’t be shaked, tipped over or hit with solid objects.
  • The device should not be used outdoors or in humid environments.
  • Do not block the ventilation holes.
  • The blades of the device shouldn’t be blocked.
  • Do not disconnect the device from the wall plug with wet hands.
  • Never leave users without adult supervision while using this product.
  • In case you notice that the feeder, the cables or the device itself are damaged, disconnect it from the power supply and do not use it.
  • Contact our technical service to repair the device.
  • Before replacing soap in the device, make sure it is turned off.
  • Power 240V (AC) 50Hz to 3V (DC) – 800mA
  • Bucket capacity: 250ml
  • Measures: 215x175x150mm
  • Weight (without liquid): 590gr
  • Shelf dimensions: 235x235x38 mm
  • Maximum shelf load: 3kg

The SHX Pompas are designed to create a visual and sensitive effect within the environment of the multisensory rooms.

When the device is activated, soap bubbles will be generated.

SHX Bubbles components

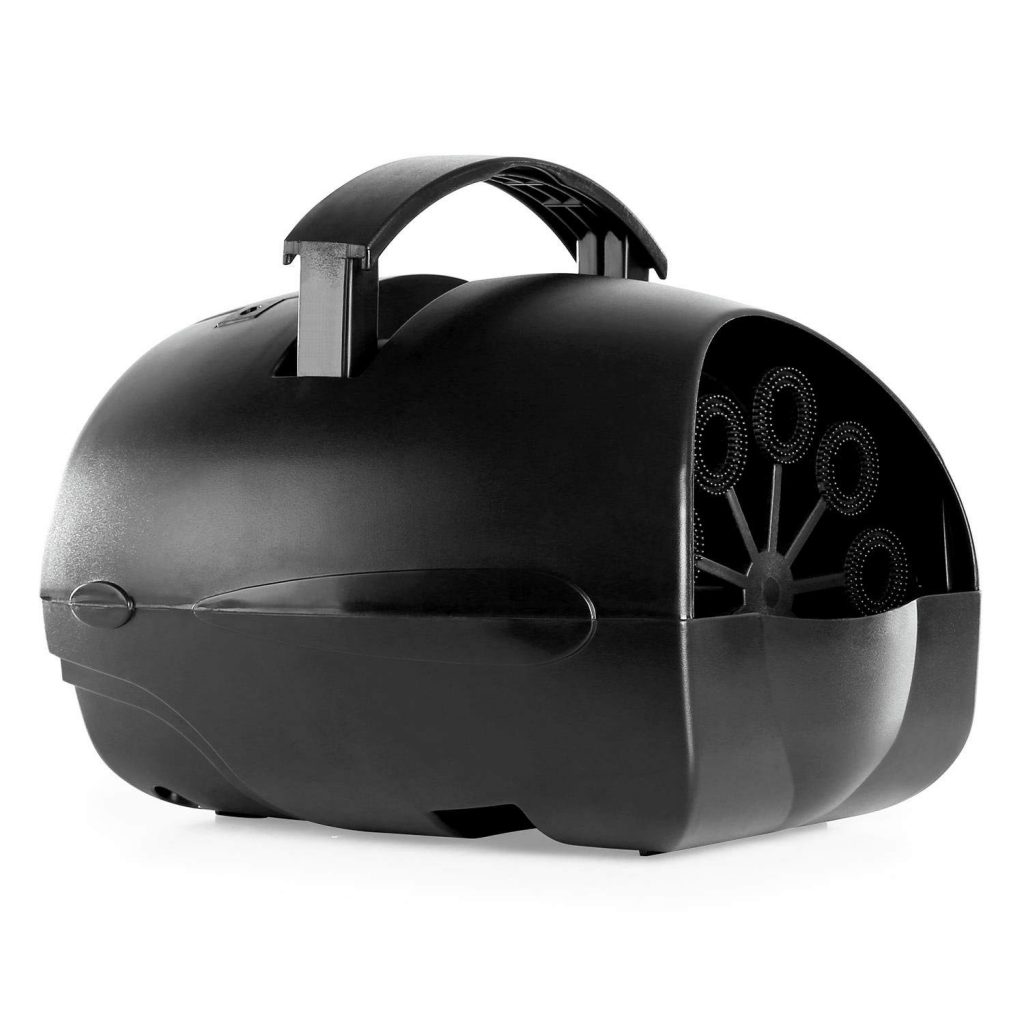
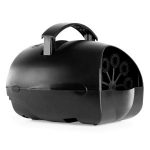
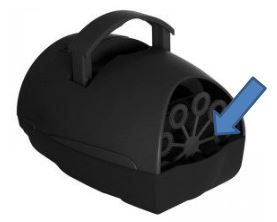
SHX Bubbles with PSU

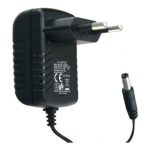
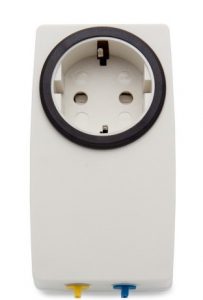
          BJ-234 BJ Enabler Socket+

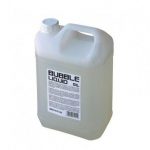
Liquid soap for bubbles (5l)

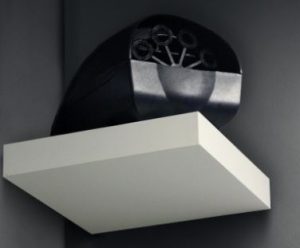
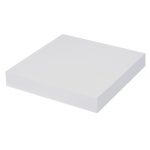
  Shelf for SHX Bubbles

For the pre-installation of the product you will need:

  1.  Power socket 230V -50Hz
  2.  Mounting surface that allows the fixing of the shelf

Unpack the product conveniently

STEP 1. Unpack the products from their boxes and check the contents.

It is recommended to keep the boxes for the duration of the guarantee period in case it is necessary to reuse it again. If you want to discard the packaging, do it responsibly.

If you find any damage or lack of material when unpacking, please contact BJ Adaptaciones +34 (93) 2850437 for assistance. Any breakdown or breakage during transport must be notified within three days of receipt.

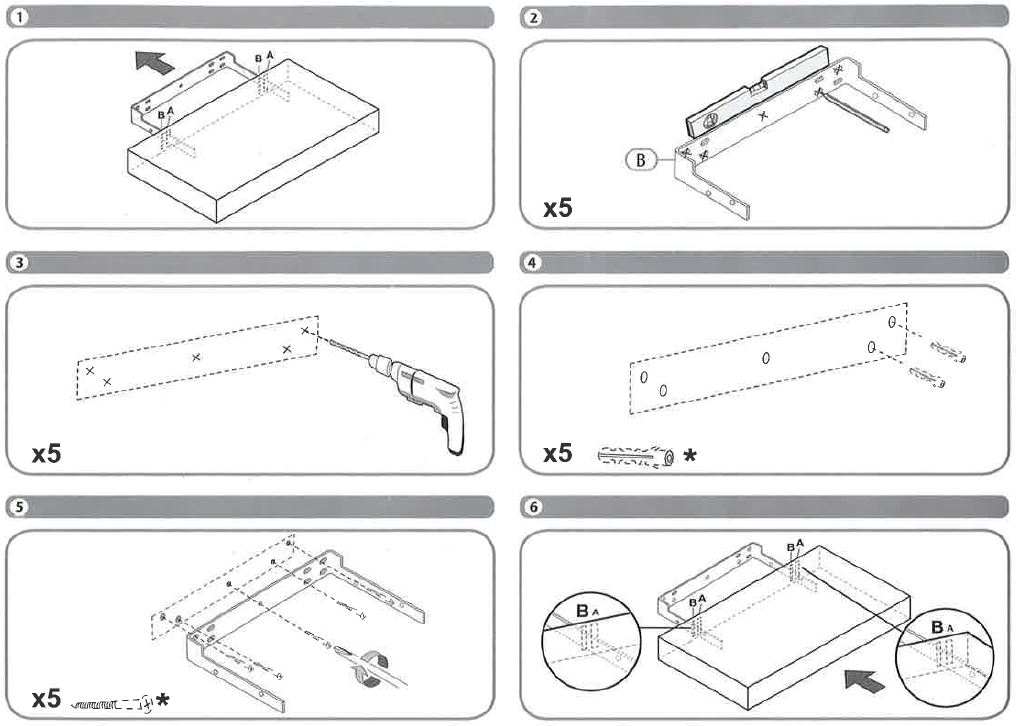
STEP 2. Fix the shelf on the wall.

IMPORTANT: to avoid any risk, the shelf must be firmly fixed on the wall. Check the suitability and strength of the wall to make sure it can support the weight of the shelf and the bubble machine.

Improper mounting can cause the pump machine to fall and can cause bodily injury.

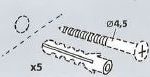
Use screws, washers and plugs suitable for the wall materail. The product does NOT include the screws or the fixing plugs. If in doubt, check with your provider so that he can advise you.


For assembly you will need the following materials (not included with the shelf): 

Follow the following steps for the assembly of the shelf:

STEP 3. Connect the feeder of the bubble machine

  • Connect the feeder to the bubble machine.
  • Plug the power supply into the Socket + socket.
  • Connect the Socket + device to the current

STEP 4. Turn on the bubble machine

Set the switch on the back of the bubble machine to position I, on.

STEP 5. Put the bubble machine on the shelf.

Make sure that the bubble machine is well seated on the shelf to prevent it from falling. 

STEP 6. Fill the bucket with liquid soap.

Put liquid from bubbles in the bucket of the bubble machine. The maximum capacity of the cuvette is approximately 250ml.

  • Check that the bucket has enough liquid for bubbles.
  • Check that the ignition switch is in the I (on) position and that the feeder is connected to the power through the Socket + device.
  • If you wish, you can connect a communicator in the Socket + device’s switch input to control the pump machine directly.


To start the machine the pump can do so from the SHX application or through a switch.

With the configuration delivered from the factory, when activating the pumps these will start up for 15 seconds.

To activate the ponpas from the SHX application, you can go to the “Control” tab of the SHX application:

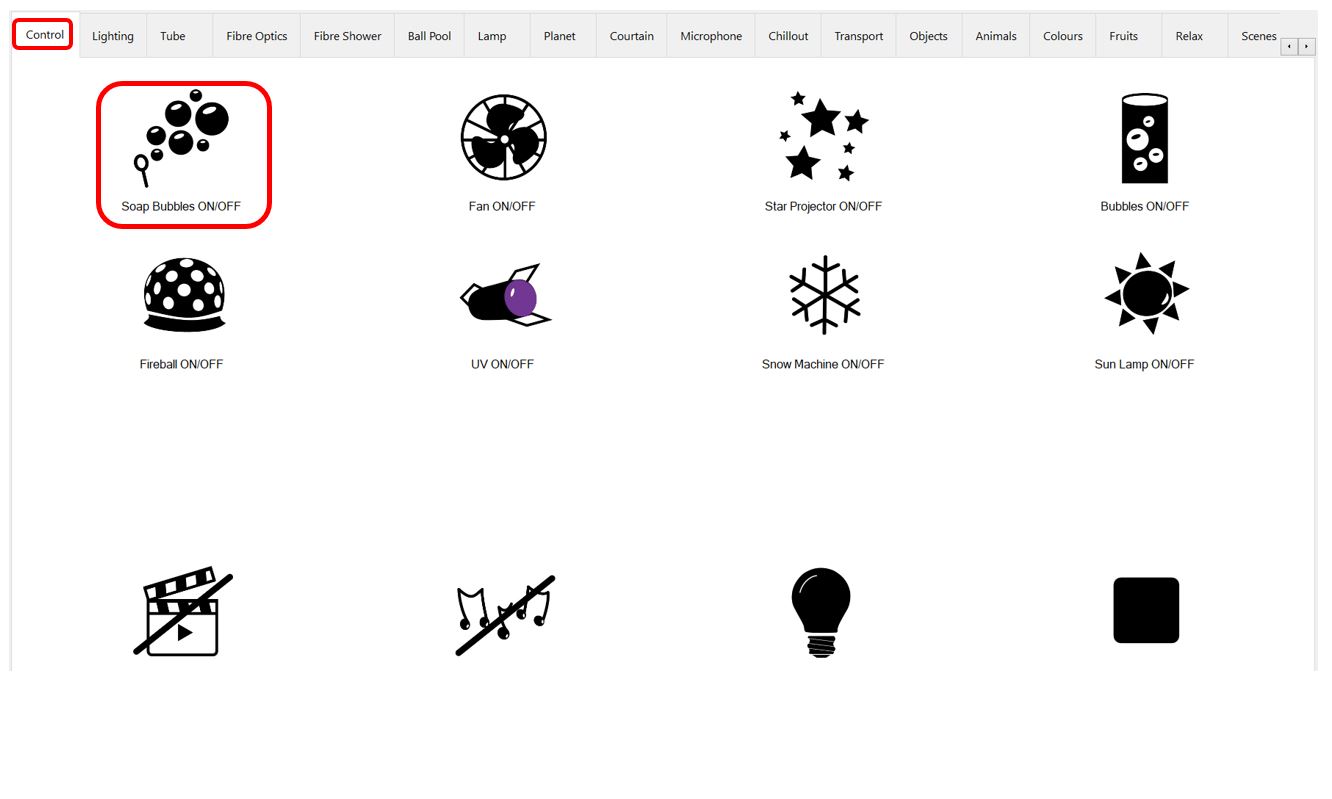
By pressing on the button indicated in the previous figure, the bubbles will be activated during the time set in the Socket +.

To change the time it will be active, you can do it using the yellow color wheel of Socket +. The following table shows the time assigned to each position of the yellow wheel:

.

To control the bubbles, the configuration of the device it’s created in the SHX application.

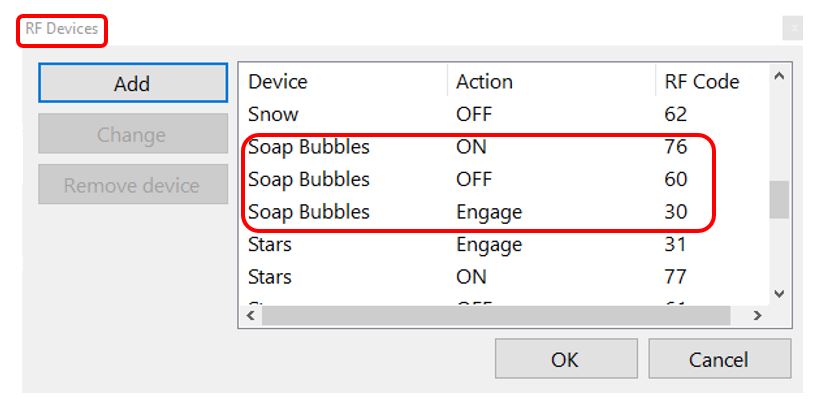
The codes to control the bubbles are received by radio frequency, the main codes for SHX Bubbles are:

  • Código 30: activate / deactivate bubbles
  • Code 60: deactivate bubbles
  • Code 76: activate bubbles

The configuration parameters for the SHX Bbubbles device are:

IMPORTANT: For the correct operation of the device, the blue wheel of the Socket + must be in the position 2.

  • For the cleaning of the pump machine it must be disconnected from the power socket.
  • Clean using soapy water and a soft cloth (wrung out).
  • Do not use chemical or abrasive products for cleaning.
  • Dry carefully the surface and do not feed until it is completely dry.
  • If you leave the device unused for long periods of time, empty the bucket for the liquid soap.
  • A periodic inspection of the devices is highly recommended, in case of detecting any anomaly, disconnect the device from the current and contact your supplier immediately for assistance.

The device doesn’t start 

In the event that bubbles don’t start coming out, check the following points:

Checks in the Bubbles machine

Check the connection of the power supply.

Make sure the power switch is on (position I).

Connect SHX Bubbles directly to the wall plug (avoiding the Socket +).

Checks on the Socket+:

If the device works by plugging it directly to the wall plug, check the configuration of the Socket + receiver. By default, the blue color wheel must be in position (2) and the yellow wheel in position (6).

After checking the configuration of the Socket + configuration wheels, plug it to the power and connect the bubble machine to the Socket + receiver.

Checks on the PC:

Check if the power supply is connected and the PC is on.

Check if SHX application is running.

Checks on Central Device:

Check that the Central Device is connected to the power supply.

Check that the Central Device is with the ignition switch in position I (lit) and that the power indicator LED (green LED) lights up.

Check that the SHX application detects the SHX Device (otherwise a warning message will appear in the SHX application). In case you do not detect it, check the USB connection of the SHX Device, close the SHX application and activate it again.

Check that the SHX antennas are mounted and securely attached.

Activate the SHX PUMPS from the control tab to check that they start up.

Not enough bubbles coming out from the machine:

Check that the bucket has enough soap.

Check that you are using the original refill of liquid soap supplied with the product.

Check that the blades of the device rotate and that a slight air breeze comes out of the bubble machine.

What kind of soap can be used for SHX Bubbles?

For the bubbles to be consistent, a specific liquid soap should be used. You can check with your supplier get the right product.

Can you use water with any soap?

Is not recommended to use other types of soap, the performance of the machine won’t be as expected.

  • To avoid possible damage to the environment or human health that represents the uncontrolled disposal of waste, separate these products from other types of waste and recycle them correctly. In this way, the sustainable reuse of material resources is promoted.
  • Private users can contact the establishment where they purchased the product or with the relevant local authorities to find out how and where they can take it to be subjected to environmentally friendly and safe recycling

Within the legal warranty period we agree to rectify for free by repairing or replacing defects in the product derived from defective materials or manufacturing defects.

Any unauthorised alteration or modifications to the product will void this warranty.

This product meets the requirements stated in Directives 2006/95 and2004/108/EC and conforms to the Declarations:

EN 60598-1/-2-17
EN 55015
EN 61547
EN 61000-3-2/-3-3

If you find any damage or any material is missing please contact our technical service for assistance.

BJ Adaptaciones
C/ Mare de Déu del Coll, 70, Bajos
08023 Barcelona, España
Fono: +34 93 285 04 37
Fax: +34 93 553 56 34
e-Mail: info@bjliveat.com
www.bjliveat.com

Any damage or breakage caused during transport must be notified within three days of receipt.