Description
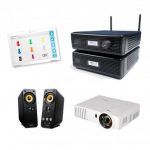
This equipment allows the user to control SHX multisensory rooms. It is composed by 2 modules: PC and the SHX Device. This manual focuses on the operation of the SHX Device, which is the core of the SHX System. The PC includes the SHX Software and demo contents.
Which elements can be controled by this device?
1) Operating the vibroacoustic elements
2) Controlling the lighting elements
3) Controlling the special effects
4) Access with wireless remotes
5) Switch access
6) Controlling elements with infrared signals
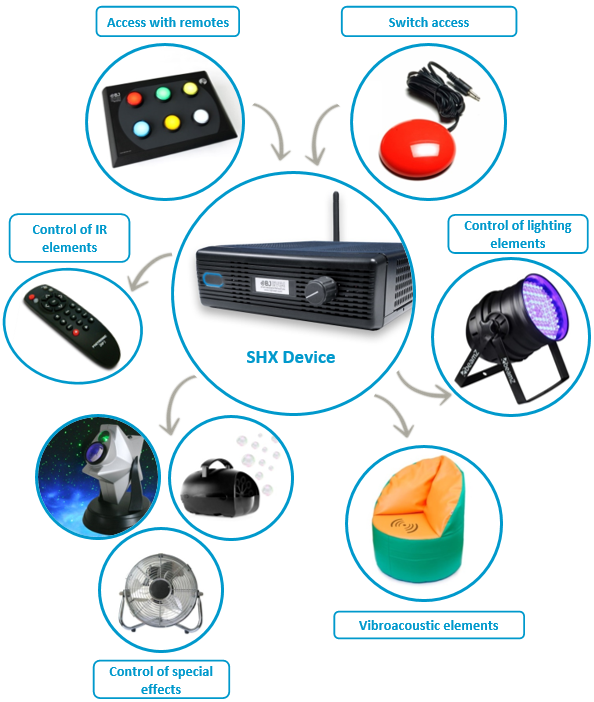
Figure 1: Elements controled by SHX Device
NOTE: Do not install the device inside metallic cabinets, since they can reduce the coverage of the radio frequency signals
First steps
1. INSTALLING THE EQUIPMENT
Connection:
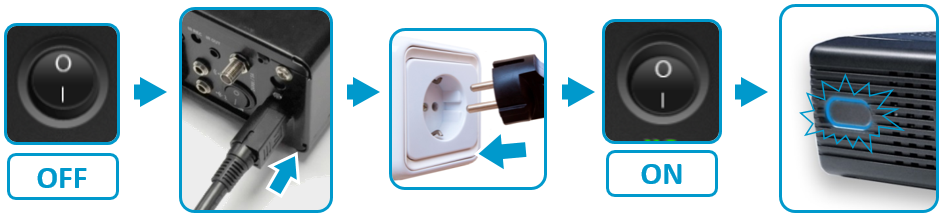
Figure 2. SHX connections
Diconnection:
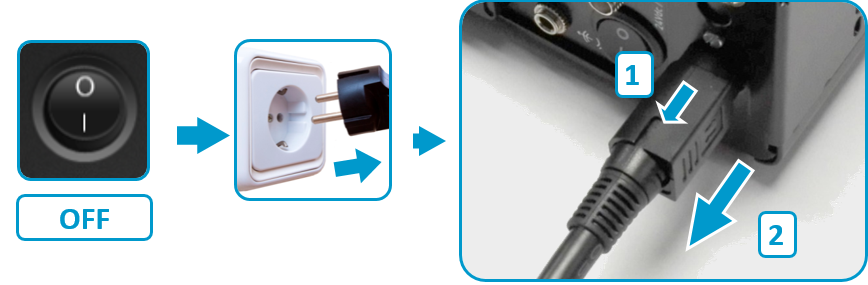
Figure 3. SHX disconnections
2. CONNECTING TO THE PC
Connect the SHX Device to the computer using the USB cable provided.
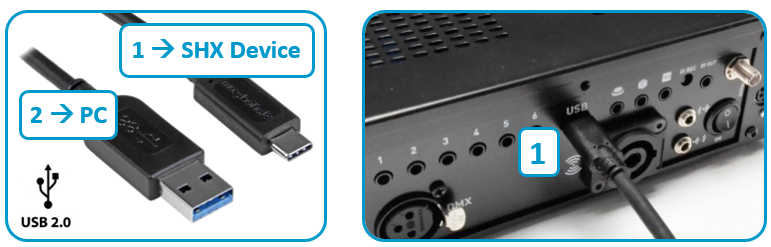
Figure 4. Connections to PC
ALERT: Connect the USB cables straight to the USB ports of the computer. Avoid using intermediate elements to connect them.
How to use
1. Operating the vibroacustic elements:
The vibroacoustic amplifier included in the equipment allows the connected elements to vibrate with the rhythm of the music, allowing to the users to feel the music in the body.
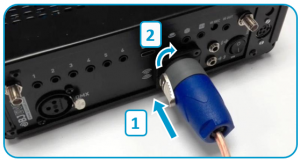
Figure 5. Connecting a vibroacoustic element
ALERT:
– Vibroacustic element: Min Ω / Max: 50W
– Do not connect audio speakers
b) Connecting the audio signal
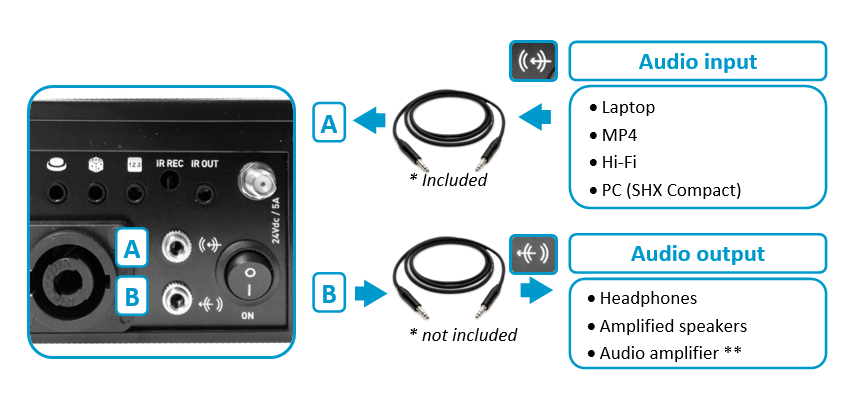
Figure 6. Connecting the audio signal
** It is necessary a Jack – RCA cable, Not included
c) Operation
Turn on the audio player (PC, MP4…). Set the volume of the audio player to the right level.
- Adjust the level of vibration using the volume control potentiometer.
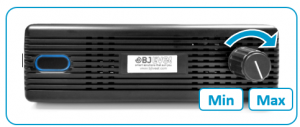
Figura 7. SHX volume control
NOTE: Settings only for vibration (the audio output signal operates independently from vibrating settings).
2. Controlling the lighting elements
It is possible to control the lighting elements in the SHX room using the SHX Device: change the colours and regulate the intensity of the lighting according to the activity and according to the environmental sound or the projected images.
a) Connections
The lights and lighting elements included in the SHX System use the standard DMX protocol. It is necessary that the lighting elements allow DMX connections.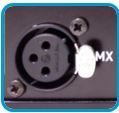
All the lighting elements must be interconnected using the DMX cables provided:
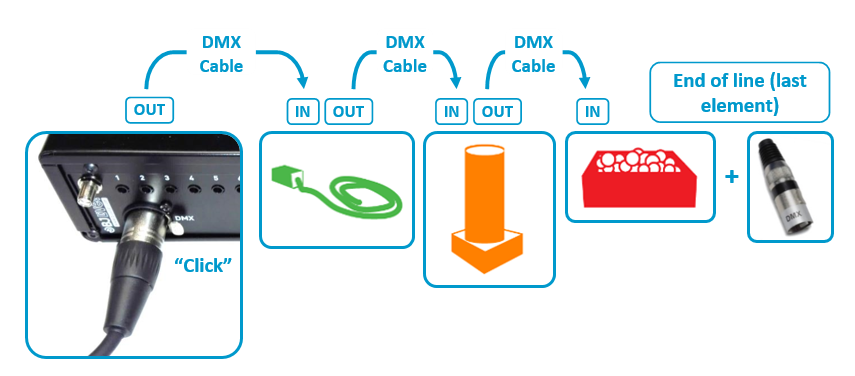
Figure 8: Connections to control lightning elements
You can change the colour of the general lighting and each lighting element with the specific contents configured in the SHX Software:
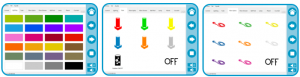
Figure 9: SHX lightning content
3. Controlling the special effects
The SHX system allows the wireless control of the elements used as special effects: fan, stars, soap bubbles, UV spotlight…
a) Connections
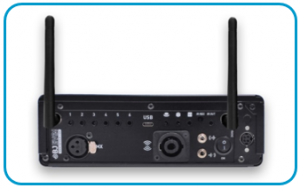
Figure 10: Special effects connections
NOTE: Install the antennae. Make sure that the antennae are not near any sources of interference.
Each element used as a special effect must be connected to the mains using the Radio Frequency receiver Enabler Socket+ (BJ-234)
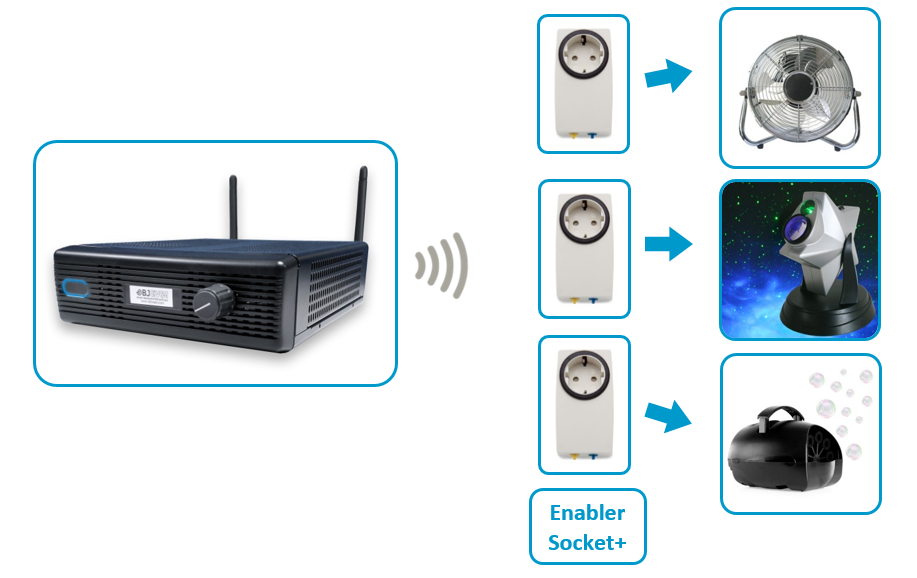
Figure 11: RF connections
b) Operation
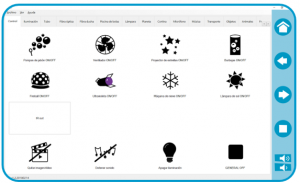
Figure 12: Special effects operation
4. Access with wireless remotes
The SHX Device can receive wireless instructions from the different elements in the room that activate the contents configured in the SHX software. Examples of these elements are: SHX Die, SHX Controller, SHX Mat…
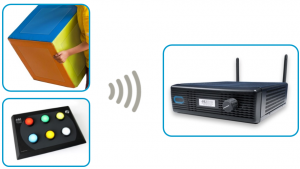
Figure 13: Access with wireless remotes
a) Connections
Figure 14: Access with wireless remotes connections
NOTE: Install the antennae. Make sure that the antennae are not near any sources of interference
b) Operation
The SHX Software content can be activated from wireless elements (SHX Controller, SHX Die…). Each button of the wireless element activates a cell (content) of the selected tab (activity).
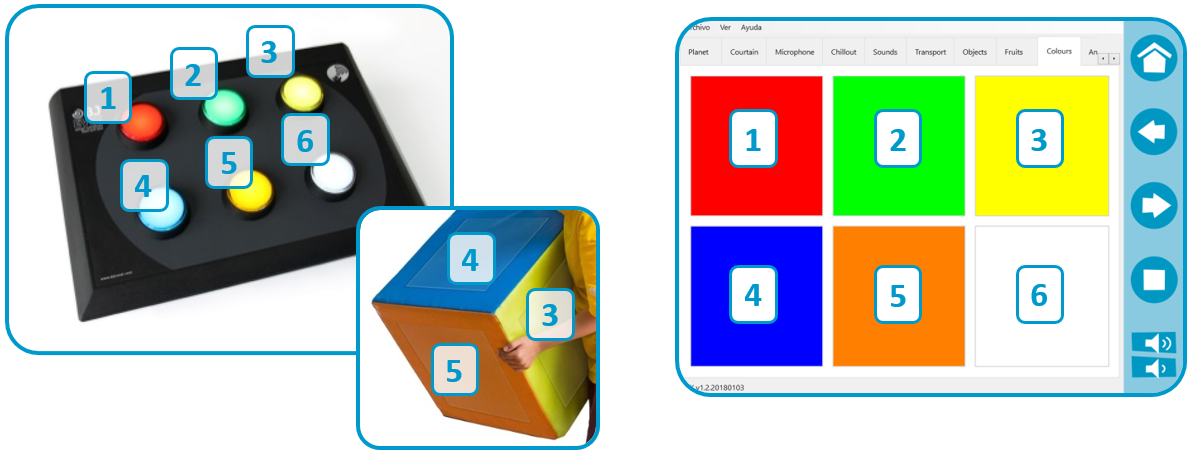
Figure 15: Access with wireless remotes operation
5. Switch access
The SHX Software content can be activated using switches.
a) Connections
Connect a switch (preferably wireless switch) to the jack inputs depending on the desired function.
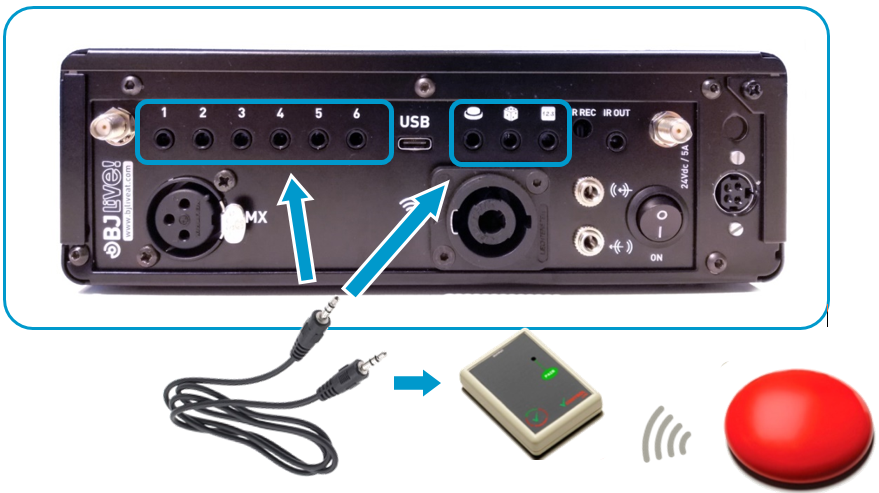
Figure 16: Switch access connections
NOTE: Make sure that the switches that you connect are not associated with any voltage source
b) Operation
There are 6 direct inputs that activate the first 6 cells (contents) of each tab (activity).
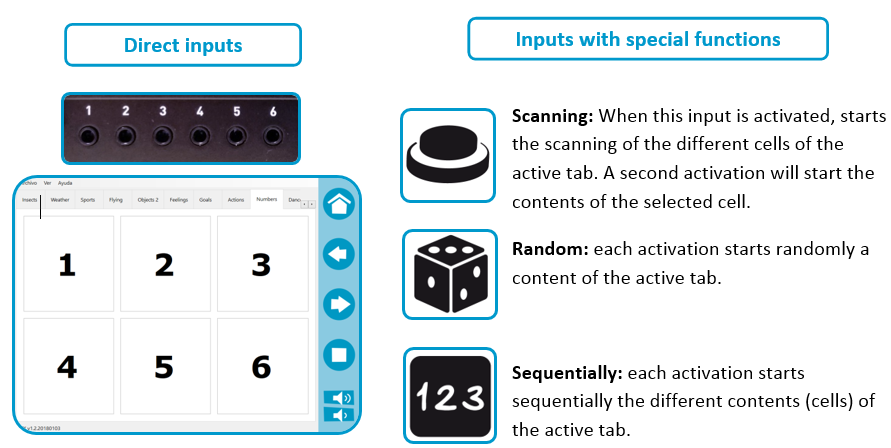
Figure 17: Switch access operation
6. Controlling elements with infrared signals
This device can control elements in the sensory environment that work by remote control, for example: multimedia projector, TV… The SHX software can be used to memorize the functions of the remote controls and activate these elements.
a) Connections
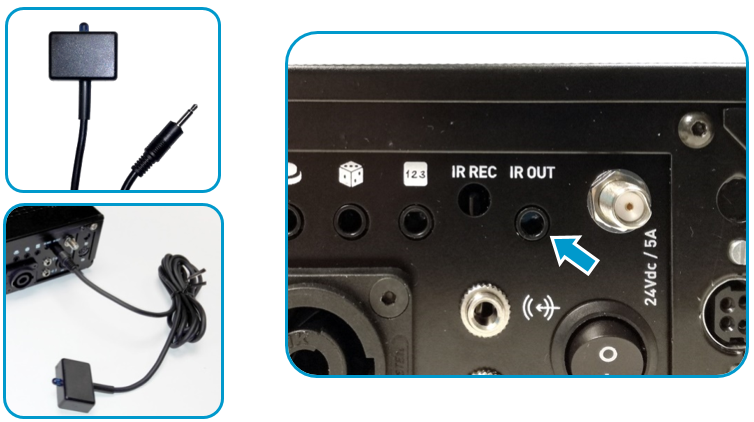
Figure 18: Controlling elements with infrared signals connections
b) Operation
The SHX software allows to memorize the “IR function” of any remote, facing the remote control towards the IR REC Identificator.
See the section “Add an action to a cell” in the Help available in the SHX Software, to integrate this function into a tab or content.
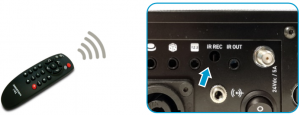
Figure 19: record remote control’s function on SHX
When activating the programmed cell, the device (controlled before by the remote control) will start operating.
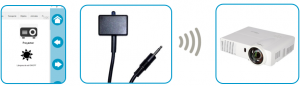
Figure 20: Controlling elements with infrared signals operation
NOTE: When you use IR to control other items, make sure that there is direct visibility between the IR transmitter of the SHX Device and the item to be controlled.
Troubleshooting
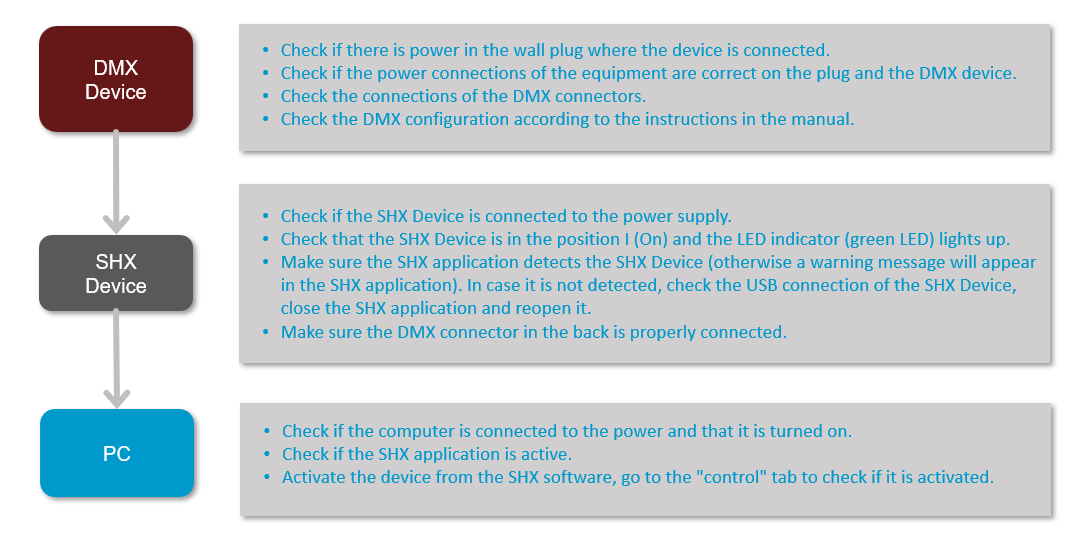
1. The following message appears in the SHX Software: “Please connect the Central Device and restart the application“
This message appears when the computer fails to detect the SHX Device. Review the following steps (section “Introduction – Firts steps” of this manual).
- Check that the device is correctly connected to the power adapter and the wall socket is working correctly. The LED light on the adapter should be on.
- Check the power supply connection.
- Ensure that the switch is in the I position.
- Check that the power LED is blue.
- Check the USB connection: press the USB connectors firmly into the ports on the SHX Device and the PC.
- Reboot the application
2. The vibroacoustic element is not responding:
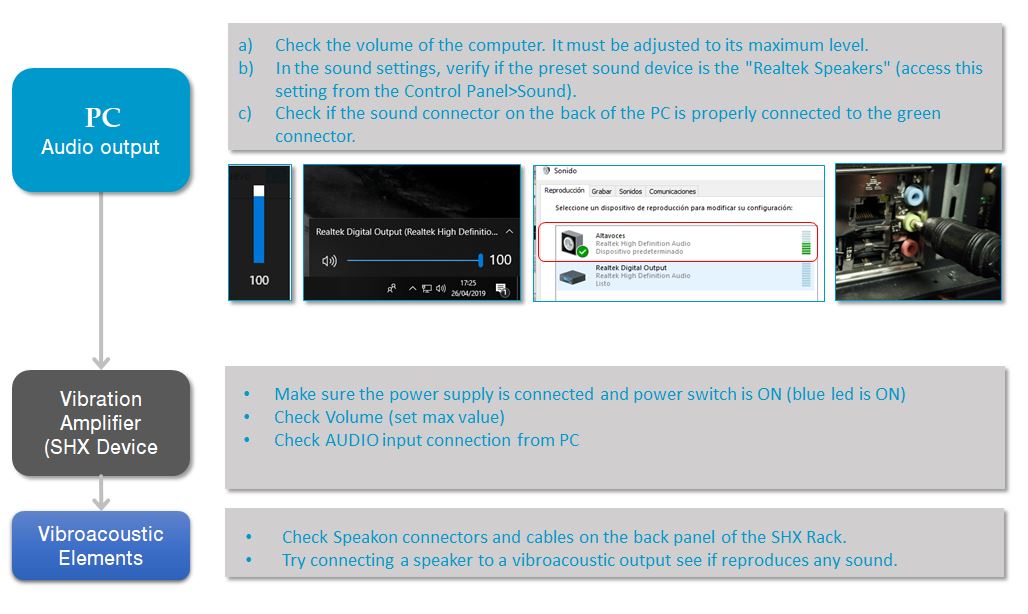
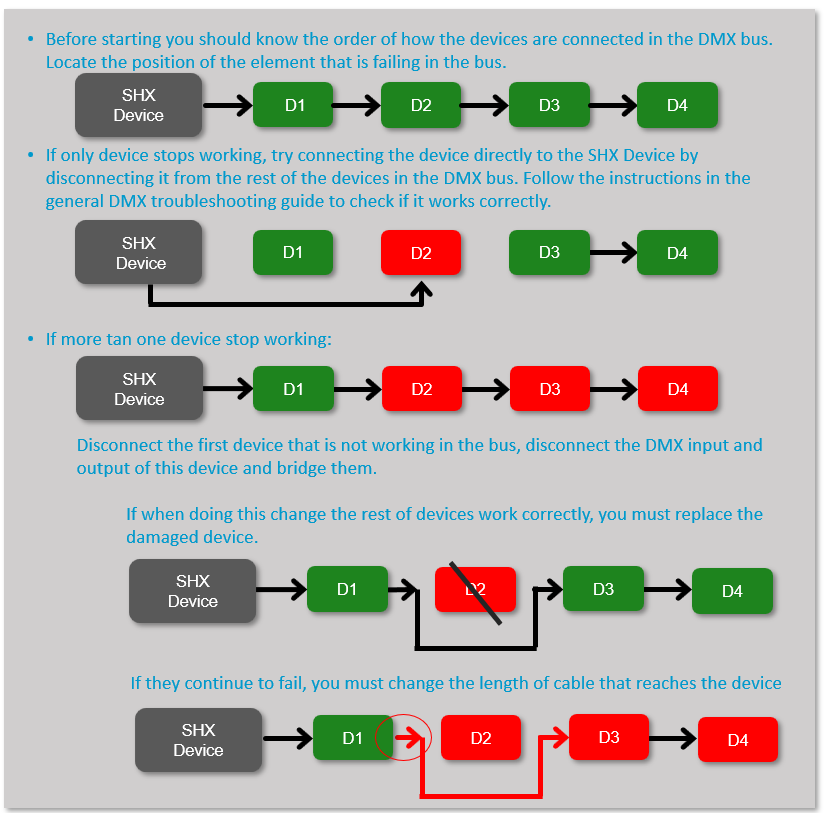
3. The lightning elements are not responding:
The lighting elements do not respond:
To verify the operation, it is better to connect a single lighting element directly to this device.
If the element that has been tested in the previous sections works correctly, add the rest of the elements of the installation one by one and:
4. The radiofrequency receivers (BJ-234 Enabler Socket+) to control the special effects are not responding:
- Review the connections (“Introduction – First steps”).
- Ensure that the antennae are correctly connected (“Functioning – 3. Controlling the special effects”).
- Check that the device is not near any items that may be interfering in the signal.
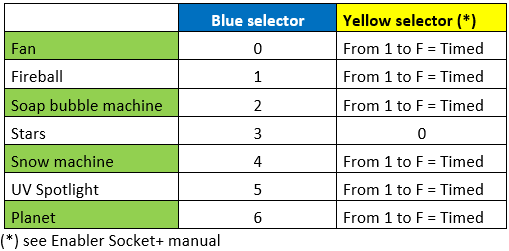
- Check that the radiofrequency code settings on the receiver Enabler Socket+ match with the SHX software:
- Verify that the position of the blue and yellow selectors of the Enabler is as corresponds to the element (see table below).
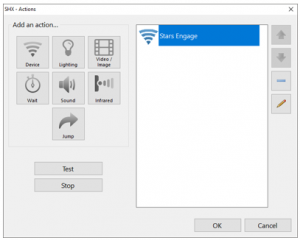
- Verify that the action corresponding to the element in the SHX Software is set to “Engage”.
- Verify that the position of the blue and yellow selectors of the Enabler is as corresponds to the element (see table below).
5. The SHX controllers (SHX Mat, Die, Controller…) are not working:
- Check the connections of the SHX Device (“Introduction – First steps”).
- Ensure that the antennae are correctly connected (section “Functioning – 4. Access with wireless remotes”).
- Check that the device is not near any items that may be interfering in the signal. Move the controller closer to the receivers.
- Check that the control element (Mat, die, etc.) is fully charged and switched on.
6. The contents are not responding to switch inputs:
- Check the connections (sections “Introduction – First steps”and “Functioning – 5. Switch access”).
- Check that the switch works correctly by connecting it to a different device.
- If the switch is wireless, check that the batteries are intact and work and that the transmitter and the receiver are correctly paired.
- Check the connection between the switch or the receiver and the jack inputs in the SHX Device.
- Reboot the application
7. The elements controlled by Infrared signals are not responding:
- Review the connections as seen in sections “Introduction – First steps”and “Functioning – 6. Controlling elements with infrared signal”.
- Repeat the recording process several times or try recording double signals in case this is the cause of the error.
- Ensure that the receiver is switched on.
- Make sure that there is direct visibility between the IR transmitter and the receiver.
- Bring the IR transmitter closer to the receiver
8. The connection between the Tablet and the SHX Software fails:
- Verify that the SHX program is running on the PC
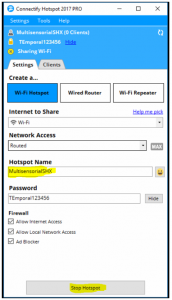
- Verify that the “Connectify” program is running on the PC (shows “Stop Hotspot”) and all the necessary parameters are introduced (“Network Access = routed” ; “Hotspot name = choose a name; “Password = choose a password“)
- Verify that the Tablet is connected to the same Wifi generated by the program “Connectify” (check that matches with the “Hotspot Name” paramenter). If they do not match, forget Tablet’s Wifi by clicking on the Wifi net and selecting “forget” and then connect to the Wifi generated by “Connectify” program.
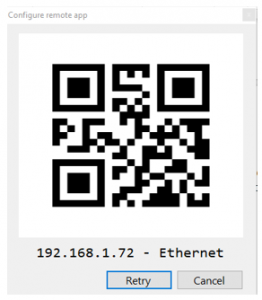
- Verify that the IP address of the server (tablet) is the one indicated in the QR code that is shown in configuration options of the SHX desktop application
IMPORTANT: Firts step is very important, if SHX is not running properly the Tablet will not be able to connect to the Wifi generated by the “Connectify” program.